Fantasy Map Builder
Fantasy Map Builder is an online tool that will allow you to display your maps to your players during a game without revealing every detail. Once a map has been built and configured in the Map Builder, the Map Viewer will allow you to to display your map to your users on a webpage that is fully zoomable and scrollable, like any good online map, without giving the whole adventure away.
It is easy to use this tool to create detailed and fully-stocked maps using the preset tiles and items in the Map Builder. These are called Grid & Tile levels. Vast dungeons can be built square by square with just a few mouse clicks. And images from anywhere on the web can be added to the map, allowing for infinite possibilities. All of the rooms and their items will be hidden the players when seen in the Map Viewer, until a single mouseclick reveals the details.
Instead of creating an entirely new map in the Map Builder, you can also use the image of a previously created map. These levels are called Freeform Image levels. You define parts of the map to be hidden from view and only revealed on a mouse click. Each map can contain multiple levels, which can be a mix of either Grid & Tile or Freeform Image levels, which means the endless possibilities for every map.
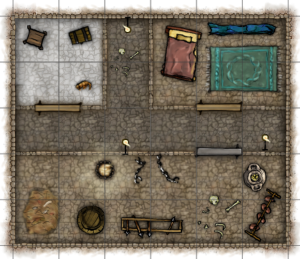
Awesome Map! But oh no! Players can see every room and now it's spoiled!
You can then display your map to your players through a computer (hooked up to your TV, projector, or futuristic holographic gaming table) and walk them through your map without spoiling everything immediately. In the Map Viewer you can add effects like Fog for a more atmospheric experience. Any Custom Items you have added to the map in the Map Builder are also available for placement. This means that you can build up a list of items, such as character tokens, monster tokens, area of effect markers, or miscellaneous spell effects, that are right at your fingertips to add into thw action as you go through your map.
Take a look at list of pre-created maps here or start a new map here.
Map Builder Basics
Set up a Level
The first step in creating a map is to add a level, which can be done by clicking the button on the lower left of the Map Builder. The Map Builder when then ask you to choose whether you want a Grid & Tile or Freeform Image level.
Grid & Tile
Grid & Tile levels consist of sections built from grid cells. Floor tiles and walls are automatically added, making it very easy to construct different layouts. A background image can be chosen or can be left blank. The wall tileset can also be chosen for the level, but the floor tilesets are selected per section. Each section is an area of the map that you want revealed at once. Sections are typically rooms and hallways. You can add sections by selecting the Dig Section option on the left and then clicking on the map to add squares to the section.
Building rooms
There is a preset list of items that can be added to a section by clickign the item and then clicking the map. Each click on the map will add a new version of the selected item, so be sure to click the Pan / Zoom / Select button to stop adding items. You can also click the button on the lower left to add a custom image from the internet. Items can be clicked on to be further scaled, rotated, and even made to fade away. Items will be hidden from the user in the Map Viewer until its section is made visible, at which time they will also appear.
Freeform Image Level
Freeform Image levels are based around hiding a Level Image, which can be revealed in carefully defined sections.
Background Image
Level Image
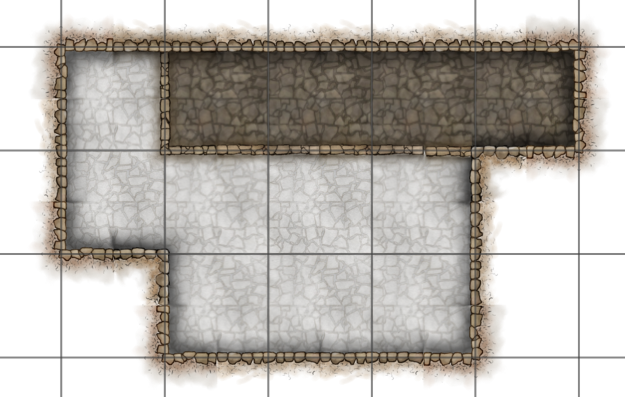
Set up Background Image, which is what will be displayed to the user. This can be an overhead view of the map with none of the inside details, a generic background texture, or even blank.
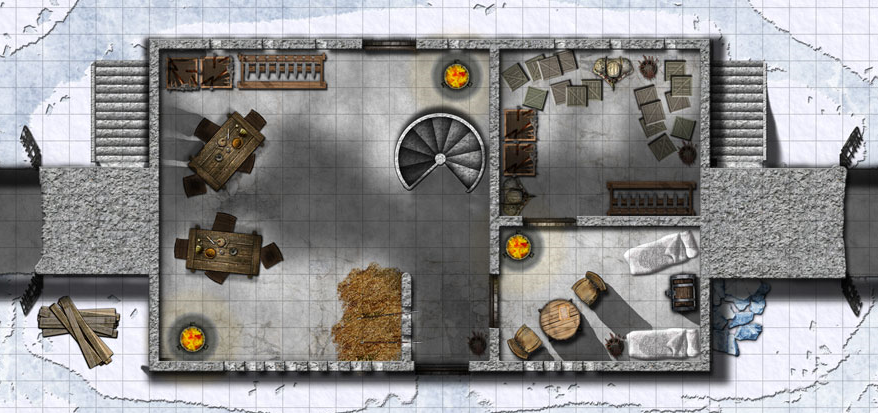
Set up Level Image, which will be initially hidden to the user. This should be a fully detailed version of the map that will be carefully revealed to the viewers by the Dungeon Master.
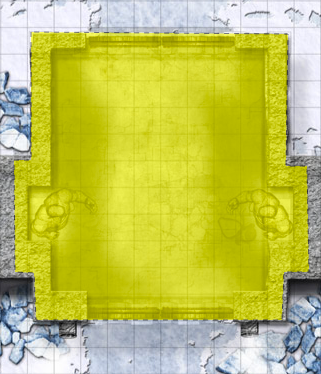
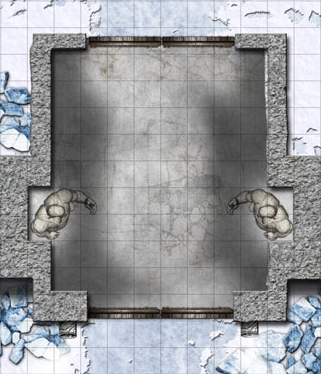
Section on Level Image
Sections are defined areas of the Level Image that can be revealed to the viewers. Sections are defined point-by-point by clicking selecting the Define Section button on the left and then clicking on points on the map.
Adding Items
Every Sections of the map can be decorated with items taken from a preset list. You can also add custom items by providing a link to any image on the web. Once you have placed an image, you can adjust its location, size, rotation, and opacity. You can even make a copy of the item with your changes and add it back to your Custom Item list. This Custom Item list will be available to you in the Map Viewer, which makes it a good place to add player tokens, monster tokens, and other items you want available for dynamic placement during a game.
View the Map
Click to reveal the section
Once a map is built, with all of its Levels and Sections defined, it can be displayed through the Map Viewer. This view of the map is what you can use to show to their players. The map will allow you to choose between the different levels of the map. It hides all levels but one, so that the players won't know how large the area is. As the players make their way through the map, you can click to reveal the carefully defined sections, revealing parts of the map on the screen. The Map View even allows you to zoom into the map to show the players all the small details of every room and to scroll around to different sections of large maps.
Take a look at list of pre-created maps here or start a new map here.